Safety Instructions:

These instructions must be read carefully and observed before installing the oil meter!

Danger of fire from combustible liquids! Take great care during grinding, cutting and welding work!

Fires, open lights and smoking are forbidden! Always keep fire extinguisher ready for use!

Danger of injury from sharp edges! Be careful during mounting!
Purpose
The oil meter may only be used to measure the consumption of heating oil L and EL or diesel fuel.
Mounting
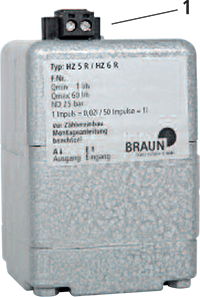
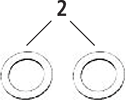
1. Check the measuring device and accessories for completeness, desired operating and given ambient conditions (chapter “Technical data”).
2. When installing the meter on the suction side, a dirt filter with a mesh size of 50-75 μ must be installed in front of the meter. Avoid air pockets as they cause incorrect measurements. If necessary, check the pipe system or the screw connection parts for leaks.
3. Switch off the heating system and remove the burner hood if necessary.
The measuring device can be installed under or outside the burner hood.
4. Adjust the pipes if necessary. The measuring device must be easily accessible!
Make sure that the connecting lines are free of chips and other contaminants before installation.
5. Fasten the holding plate [5].
In order to guarantee perfect ventilation during commissioning, the oil meter should be mounted with the connections (A + E) inclined downwards or backwards.
Danger! The meter must not be installed upright. Make sure that the roller counter is easy to read!
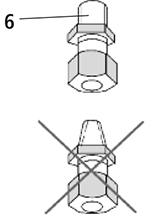
6. Remove the plug [8] from the back of the oil meter and screw in the screw-in pin [6] with a cylindrical thread.
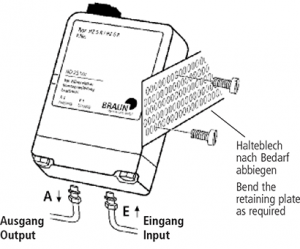
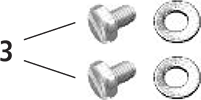
7. Ölzähler [1] mit Hilfe der Befes- tigungsschrauben mit Scheiben an dem Halteblech [5] befestigen.
8. Leitungen anschließen und die An- schlussverschraubungen festdrehen.
Technical Data
|
Durchflussbereich HZ 5 R Brennerleistung |
0,7 … 40 l/h (0,6 … 34 kg/h) 7 kW … 400 kW |
|---|---|
Durchflussbereich HZ 6 R Brennerleistung |
1 … 60 l/h (0,8 … 50,4 kg/h) 10 kW … 600 kW |
Ablesemöglichkeit am Ölzähler |
0,01 l … 99999,98 l |
Messgenauigkeit |
± 1 % |
Nenndruck |
25 bar |
Druckverlust (Besonders bei Einbau in der Saugleitung zu beachten!) |
0,05 bar … 0,2 bar |
Heizölsorte |
EL nach DIN 51603 |
Temperaturbereich/ Umgebungstemperatur |
–5°C … +70°C |
Anschlussgewinde |
DIN 3852-X-G 1/8” innen |
Maße |
60 x 60 x 85 mm |
Gewicht |
0,6 kg |
Starting up
- If the oil meter is installed in the pressure line in front of the burner nozzle on the pressure side, the set pump pressure should be reduced briefly before starting up the system to prevent damage from pressure surges on the diaphragm of the oil meter.
- Switch on the pump.
- Open the shut-off valves slowly.
- Avoid pressure surges in order not to damage the measuring device!
- Air pockets cause incorrect measurement results and can lead to damage!
Recommendation
When installing the oil meter in the pressure line in front of the burner nozzle.
In order to prevent any dripping that may occur, we recommend installing an additional solenoid valve after the meter.
Recommendation
- Clean the filters in front regularly.
- Check connections and lines for leaks!
The measuring device must be kept clean and requires no maintenance.
After 8-10 years we recommend a factory check of the oil meter for measuring accuracy.
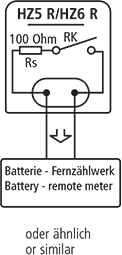
Example 1:
Connection to active input e.g. battery counter
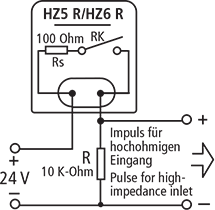
Example 2:
Connection to passive input
HZ 5 R / HZ 6 R – Reed Contact Data
Reed Contact:
– Pulse value: 1 pulse = 0.02 l
Contact type NO:
– max current 70 mA / ma. Voltage 30V
– Integrated protective resistor RS:
100 ohms / 0.6W
– Voltage drop across Rs at 10mA: 1A
Pulse frequency:
· Bei40l / hca.0,2Hz (HZ5R)
· Bei60l / hca.0,2Hz (HZ6R)
Note:
- Avoid magnetic field that is too close: e.g. Fan or solenoid valve
- Pay attention to the protective diode when connecting the relay
- Do not connect low-resistance voltage sources in parallel to terminals!
Installation Options
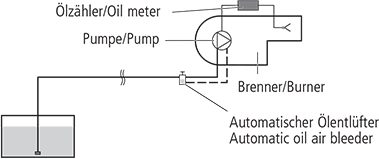
Two-pipe system installation in pressure line
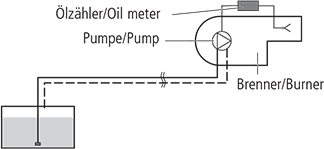
One-pipe system installation in suction line
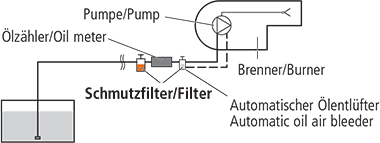
Installation in pressure line